4.6 Setup Ground Control Points
Ground Control Points (GCPs) are primarily used to improve aerial triangulation accuracy. Setting GCPs can be done before or after aerial triangulation processing.
Click the button to enter the Set Ground Control Points page:

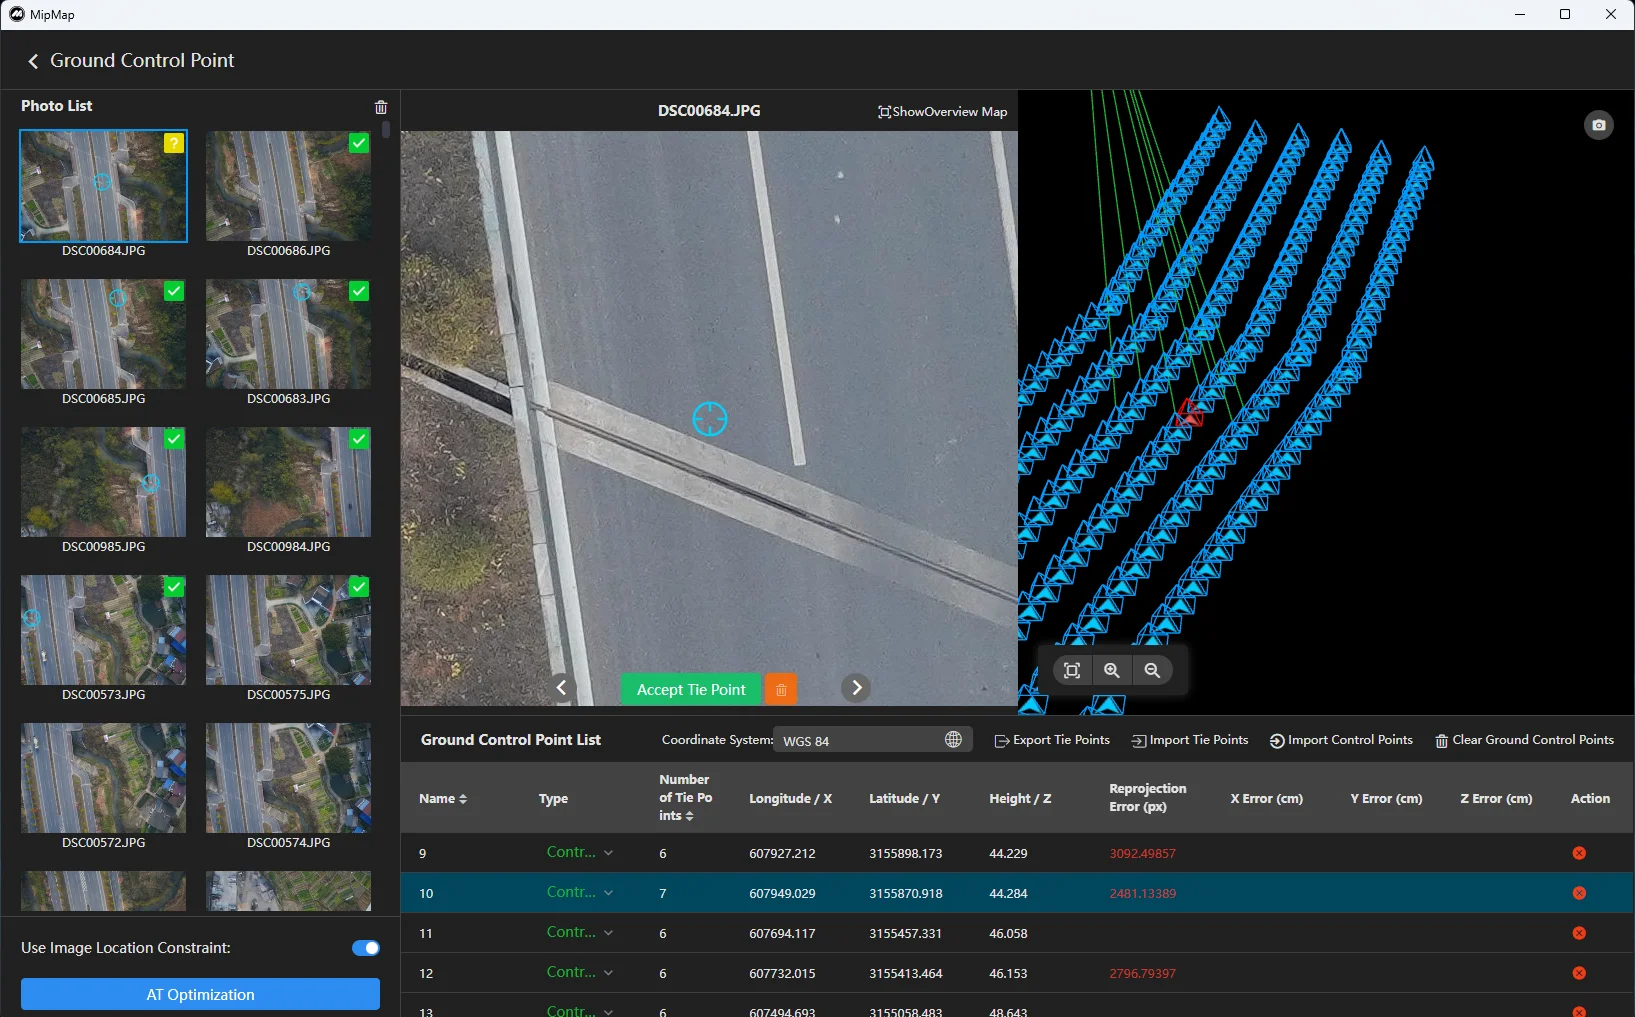
Area ① is the photo list. When a GCP is selected, the photo list will display the predicted point location and marking status. Area ② is the GCP list, which displays the coordinates, marking status, and error size of the GCPs. Area ③ is the photo preview panel, where you can zoom in on photos and click to mark GCPs. Area ④ is the map panel, which displays aerial triangulation results, camera poses, GCP locations, and marking status.
Import Ground Control Points
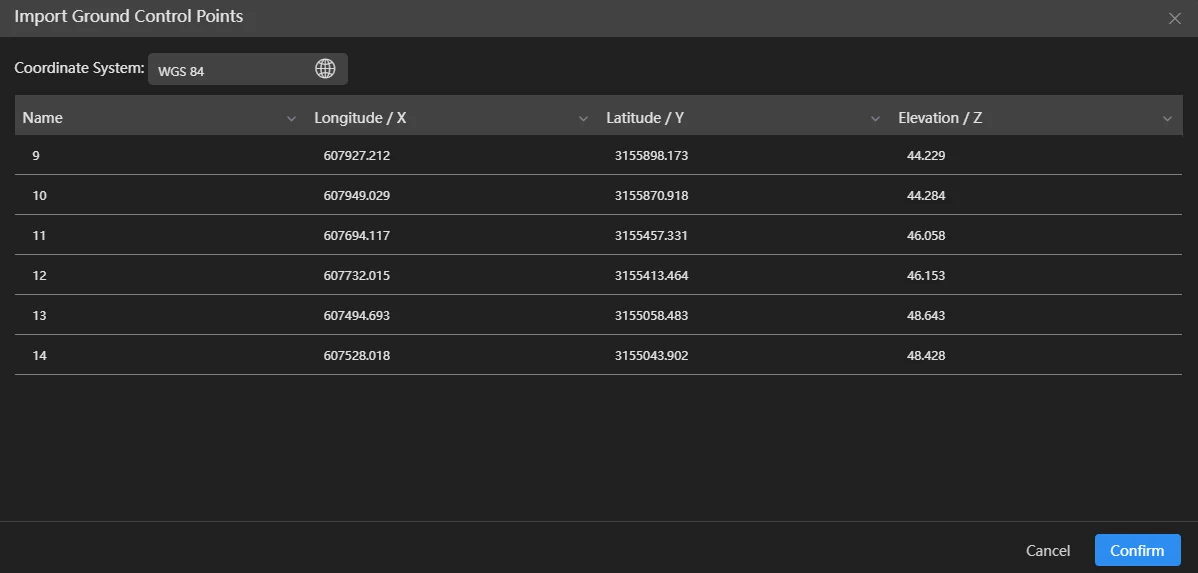
Click the "Import Control Points" button in the upper right corner of the GCP list panel, select the control point file to import (supports csv, txt, etc. formats). The software will automatically recognize the delimiter. In the control point import dialog box, set the coordinate system and elevation system of the control points, select the name and coordinate fields of the control points, and click the "OK" button to confirm the import.

Ground Control Point Marking
After importing control points, the photo list on the left will display the predicted photo list and the predicted marking points on the photos. The map panel will display the locations of the control points, and the control point list panel will display the list of control points, with the first control point selected by default.

- Marking
Select the photo to be marked in the photo list on the left. In the photo preview panel, you can zoom in on the photo and click the position of the control point to mark it. If the software's predicted point position is consistent with the actual control point position, you can click the
button below to use the predicted point as the marked point.
- Delete Marking
In the photo preview panel, click the
button below to delete the marking. If you need to delete all markings for this control point, click the
button in the upper right corner of the photo list to delete all markings.
- Overview Map The upper right corner of the photo preview panel displays an overview map. The overview map can display the complete photo when zooming in on the marking point. You can set whether to hide the overview map.
Set Ground Control Points
- Set Ground Control Point Type In the GCP list, set the type of GCP, including Control Point, Check Point, and Disabled Point. Control points are used to participate in aerial triangulation optimization; Check points are used to check the model error after optimization and do not participate in aerial triangulation optimization; Disabled points are used when GCPs cannot be used, such as when GCPs are obscured during aerial surveys, preventing them from participating in aerial triangulation optimization.
- Add Ground Control Points Click "Import" to reselect the GCP file. The software will check if the re-imported GCPs have points with the same ID as the current control points. If there are identical points, you can choose to skip or overwrite.
- Delete Ground Control Points
Click the
button to the right of a control point to delete a single control point. Click the "Clear Control Points" button in the upper right corner of the panel to delete all control points.
Execute Aerial Triangulation Optimization
After control point marking is complete, click the "Aerial Triangulation Optimization" button below the photo list to execute aerial triangulation optimization. After execution, the GCPs will display the reprojection error and the mean error in X, Y, and Z directions for each GCP.

Import and Export Marking Results
Click the "Export Markings" button in the upper right corner of the GCP list to export the current marking results as a JSON file. Click "Import Markings" to import marking results.