4.2 Edit POS
Different image acquisition devices may provide POS (Positioning and Orientation System) data in different formats and with varying parameters. The software provides users with corresponding functions to edit POS data.
Open Edit POS Panel
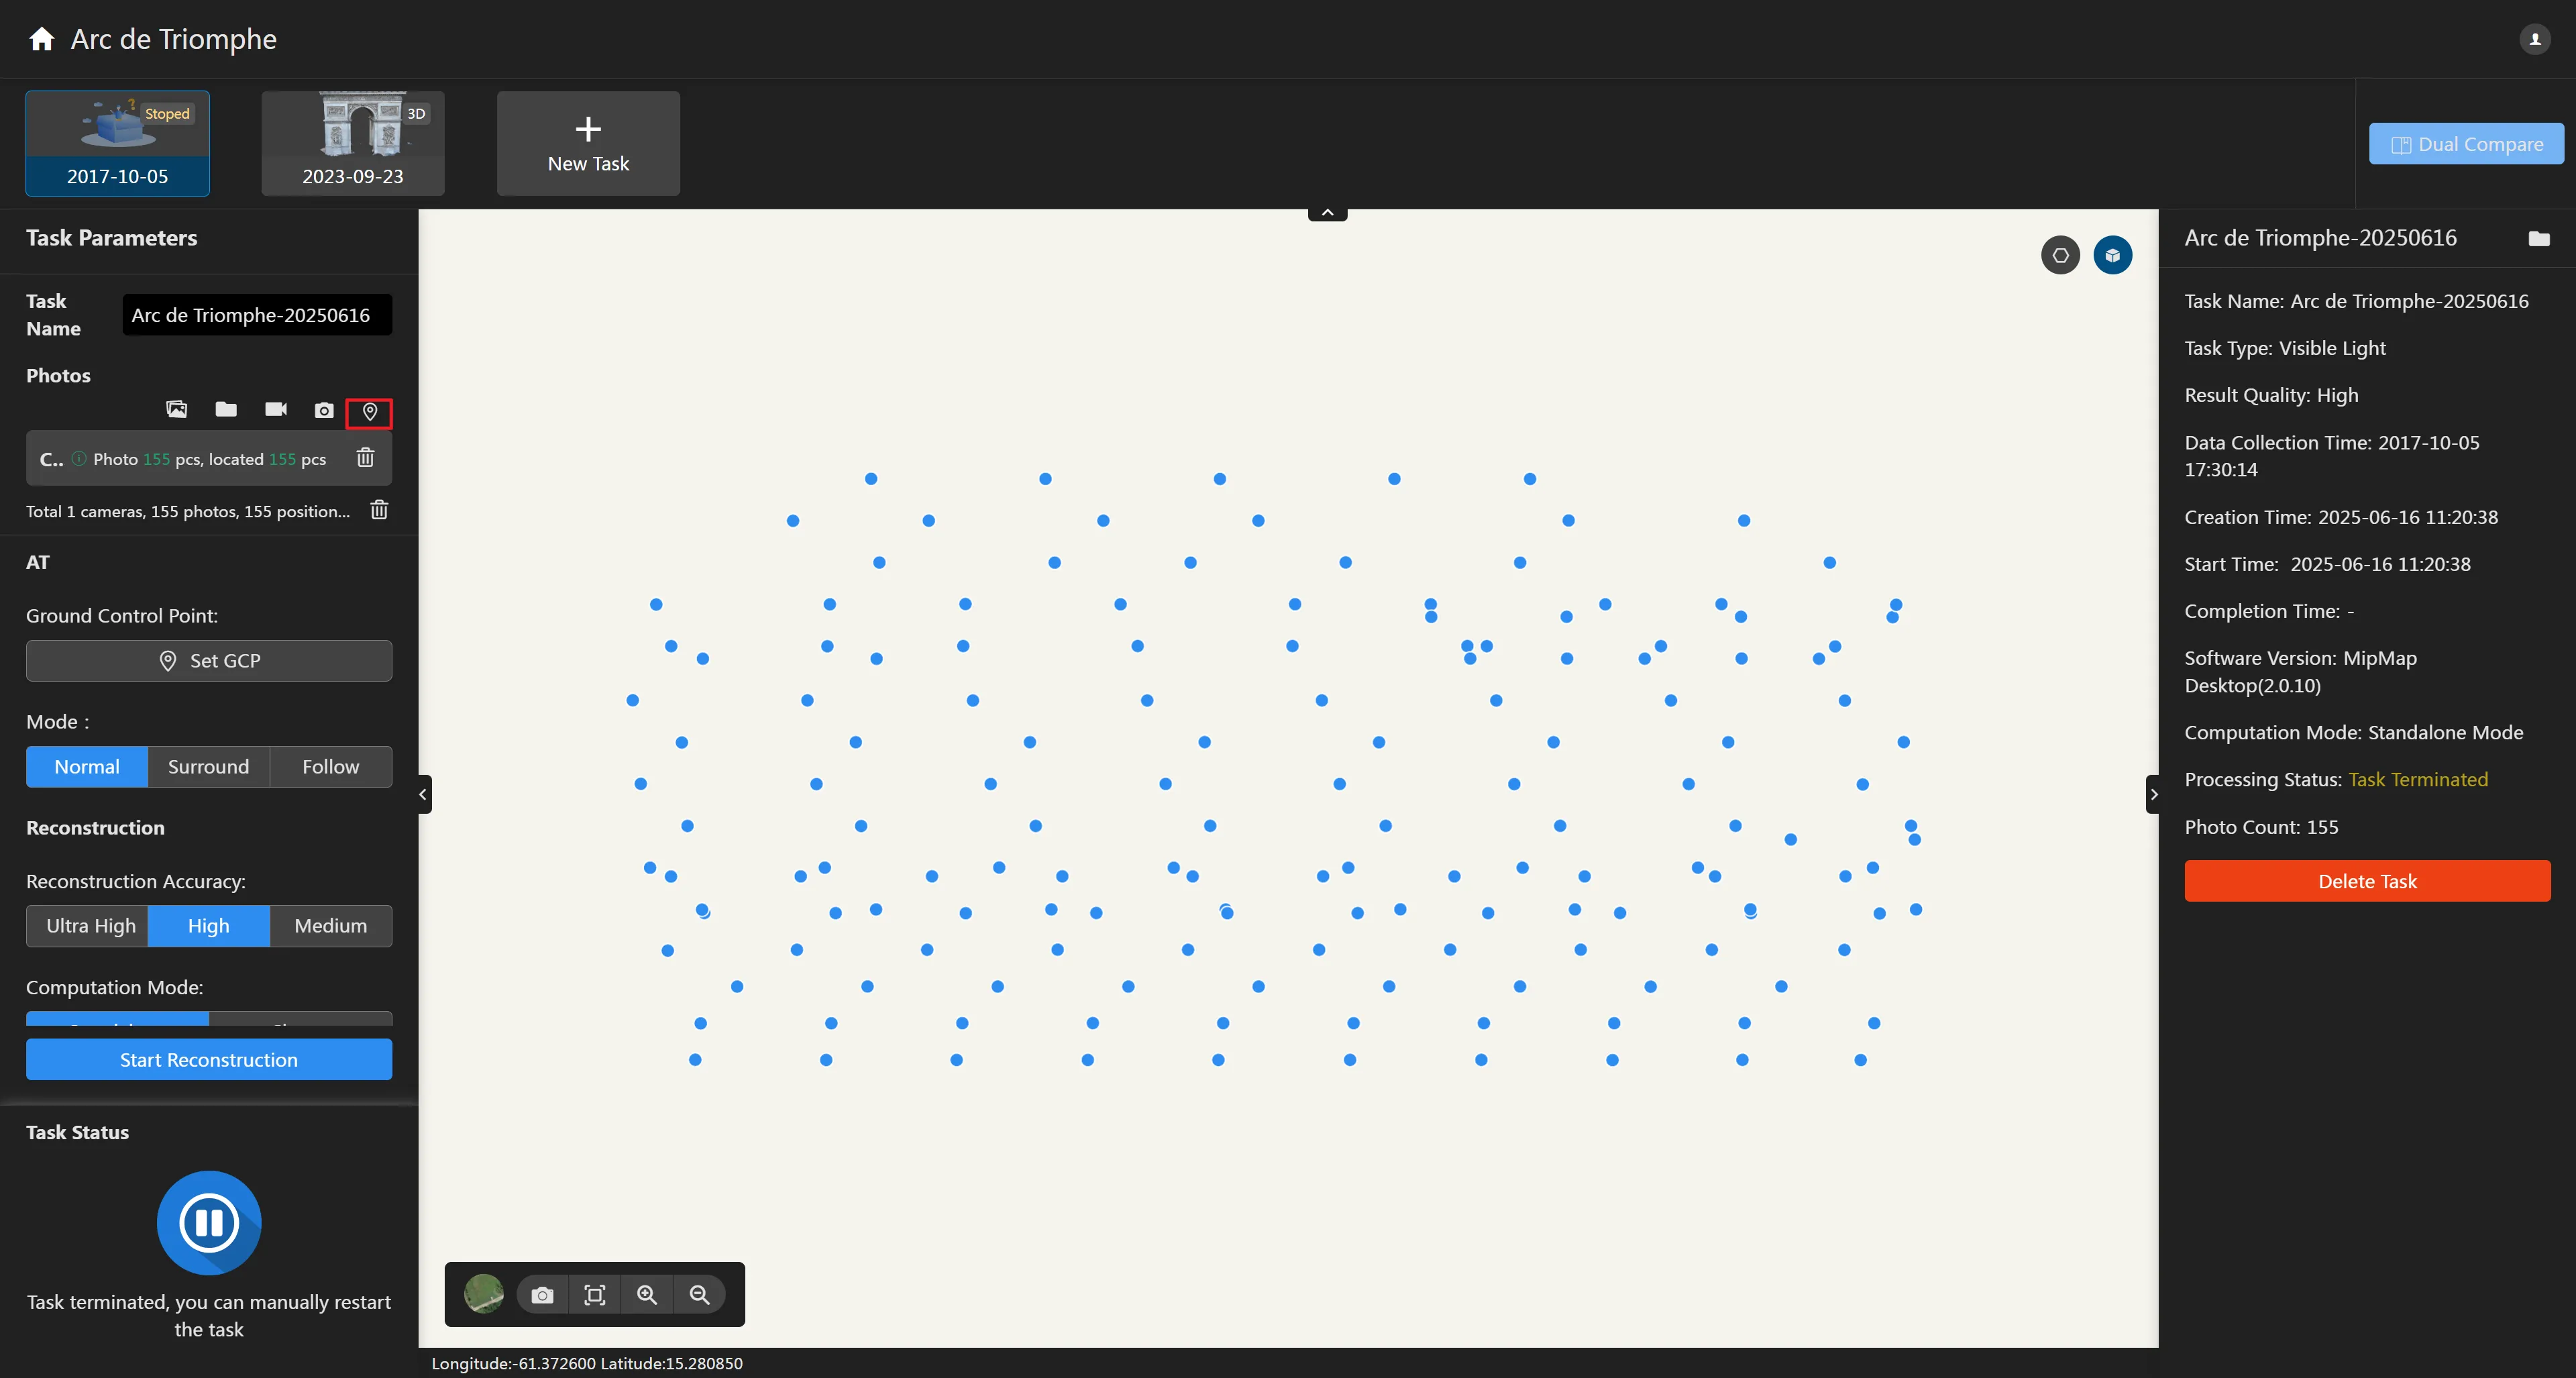
Click the "Edit POS" button above the camera list to enter the Edit POS panel.

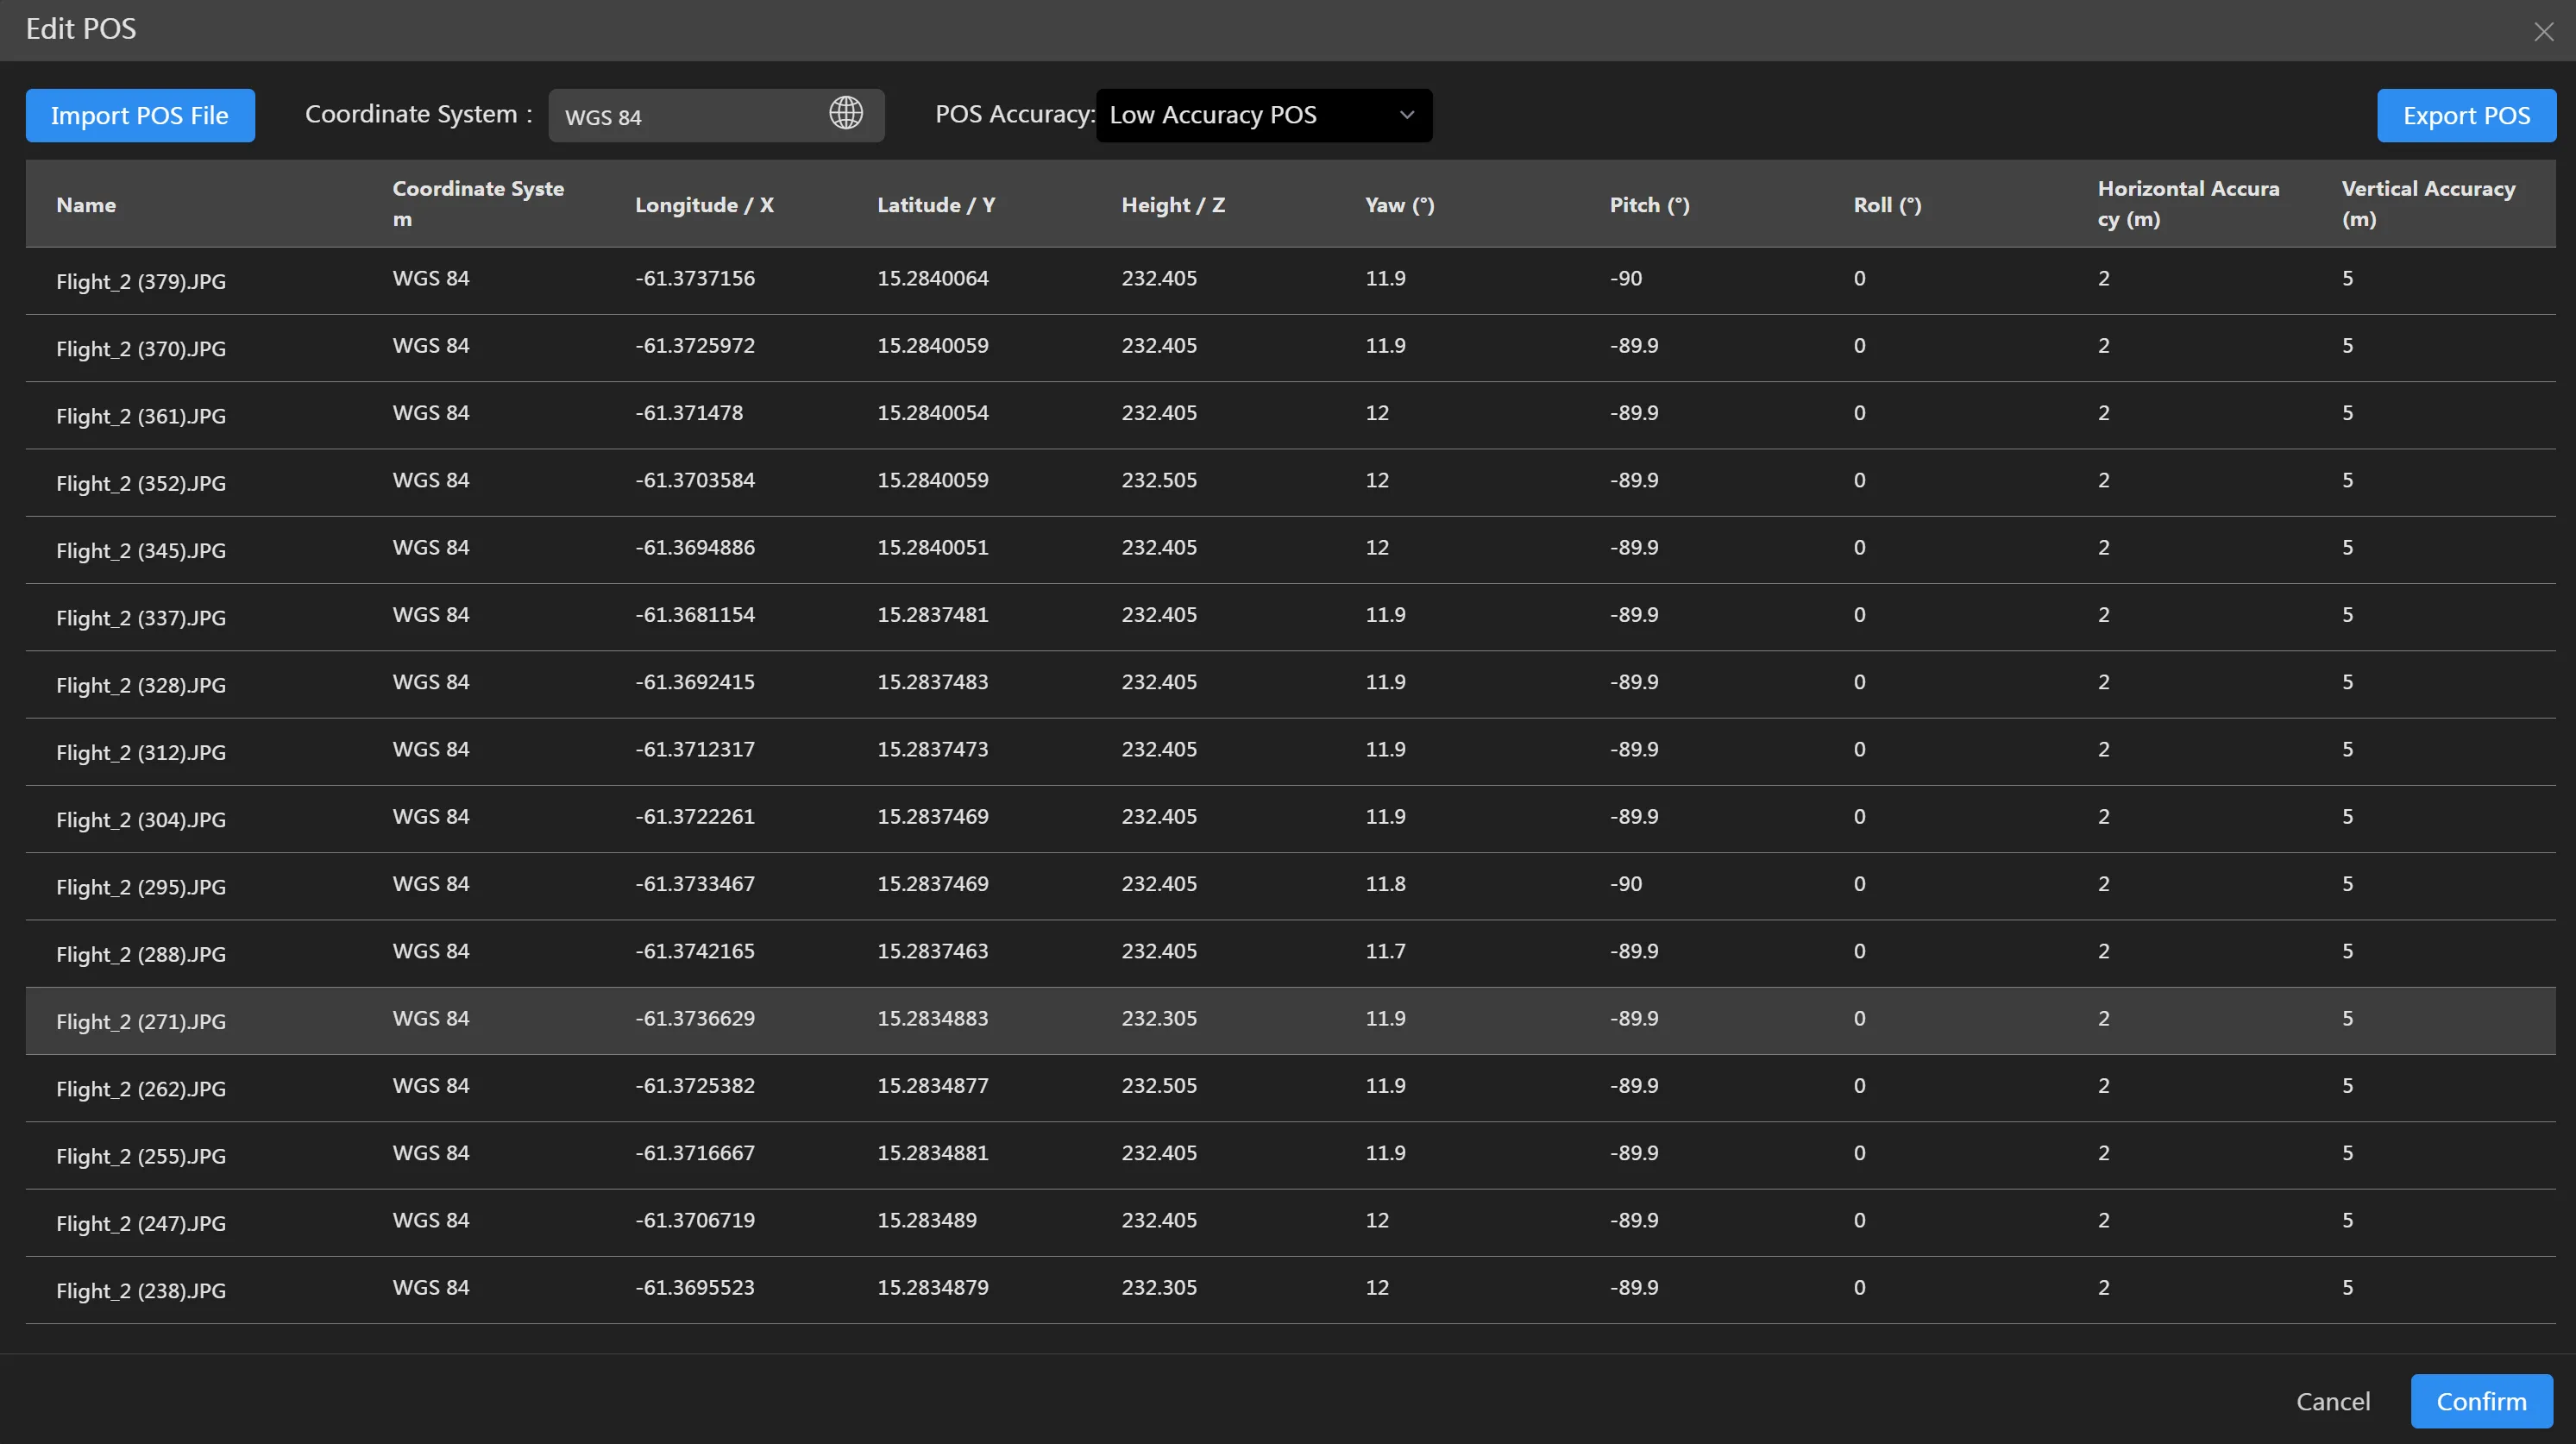
The Edit POS panel provides users with functions such as importing external POS files, editing POS coordinate systems, and setting POS accuracy.

External POS Import
Under normal circumstances, after importing photos, the software will automatically read the position information from the photos. If the photos do not contain position information or the information is inaccurate, you can also manually import the position information for the photos.
Click the Import POS File button , open the select file dialog box, choose the POS file to import. It supports text files in txt, text, csv formats, and various delimiters (comma, semicolon, space, Tab, etc.).
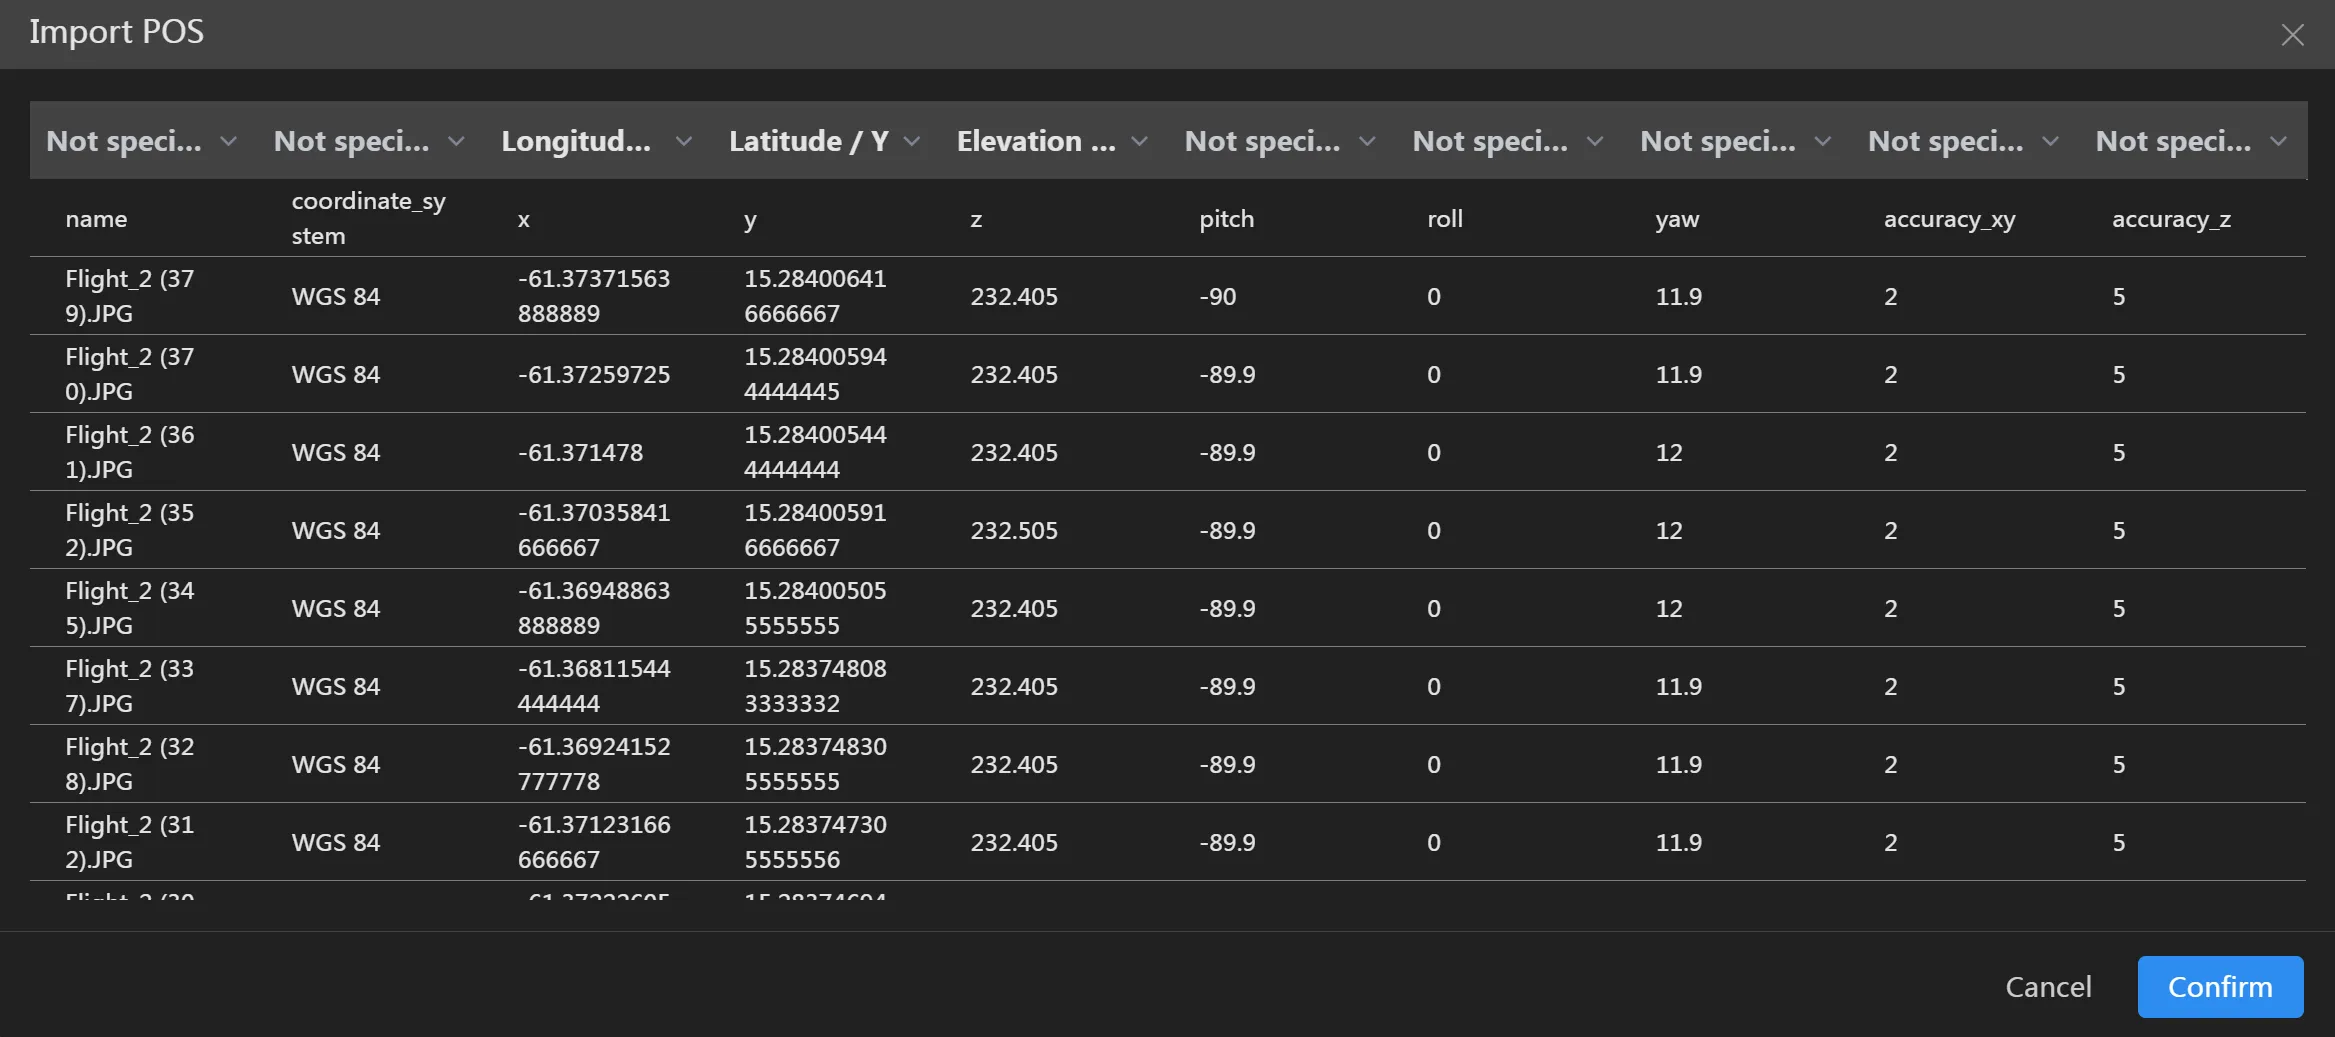
After selecting the POS file for import, the software automatically organizes the POS file into rows and columns based on the delimiter and displays it in the panel.

The software supports three types of POS files: without attitude angles, attitude angles in YPR rotation system, and attitude angles in OPK rotation system. Select the attitude angle format, click the dropdown box above each column, select the field information for that column's data, and then import the POS file. When selecting "without attitude angles", you need to select 4 fields, including: Name, Longitude/X, Latitude/Y, Altitude/Z. When selecting the YPR rotation system, you need to select 7 fields, including: Name, Longitude/X, Latitude/Y, Altitude/Z, Yaw, Pitch, Roll. When selecting the OPK rotation system, you need to select 7 fields, including: Name, Longitude/X, Latitude/Y, Altitude/Z, Attitude Angle/Omega, Attitude Angle/Phi, Attitude Angle/Kappa.
Set Coordinate System
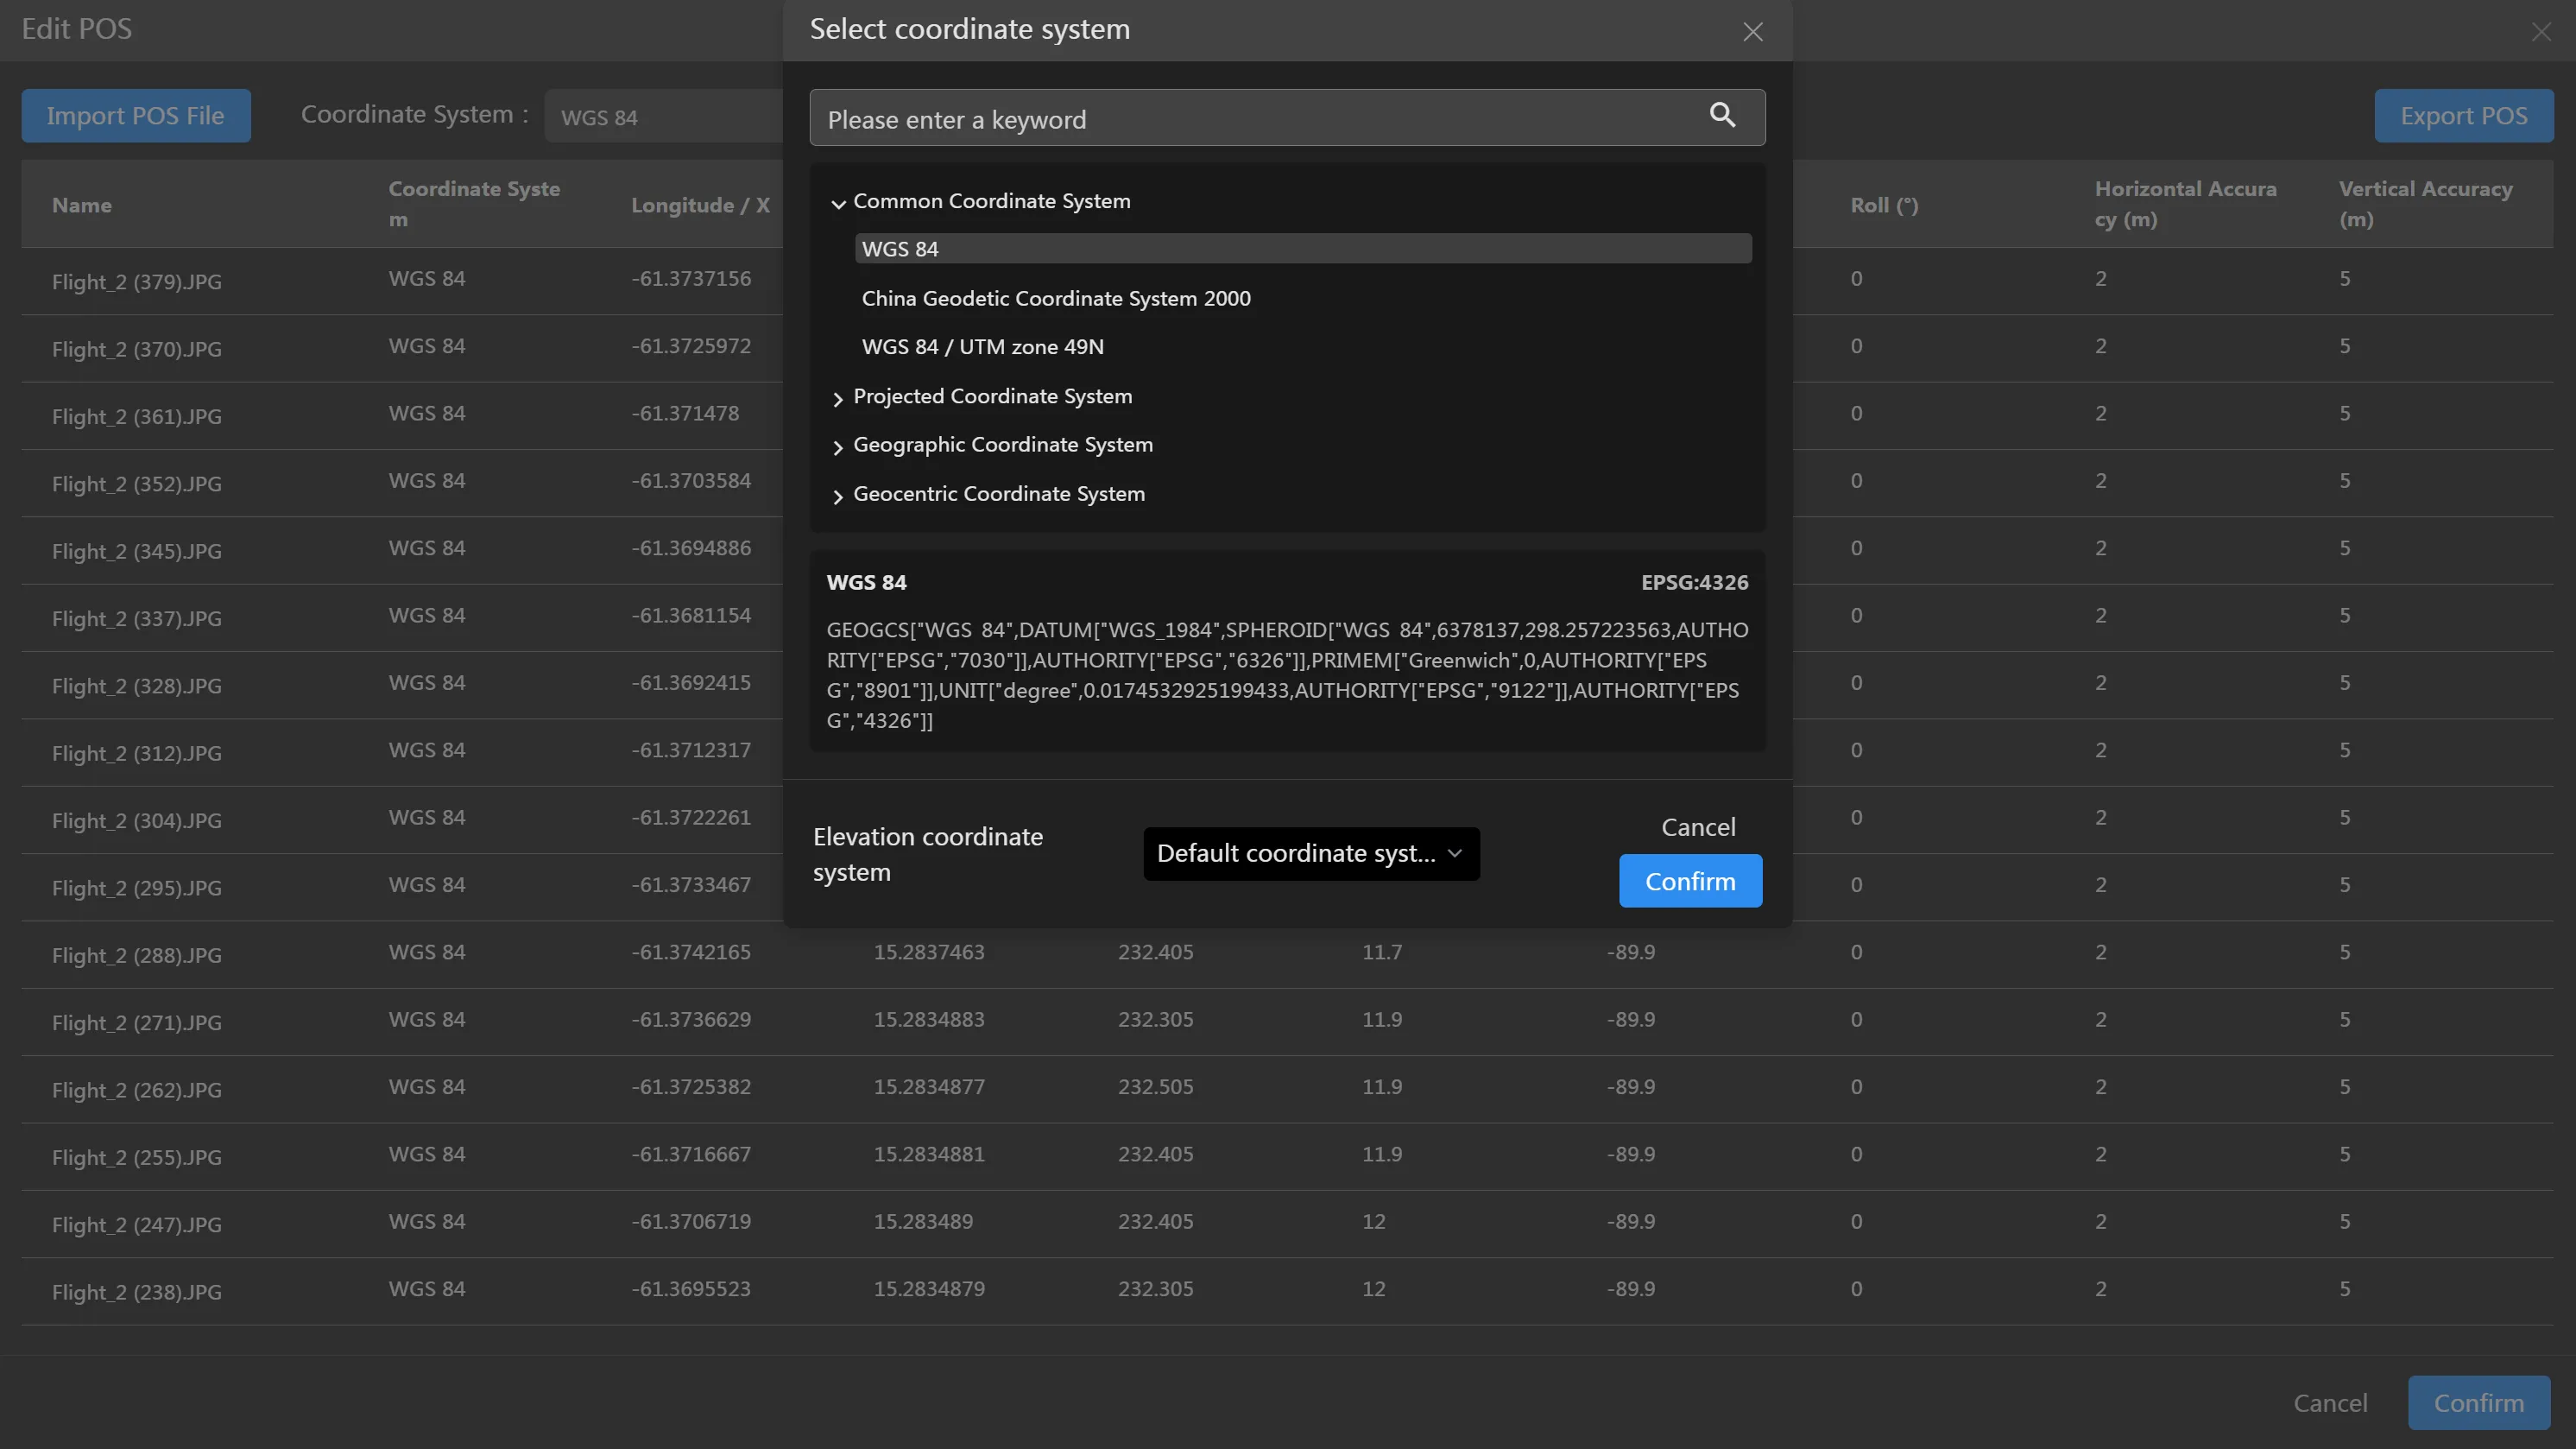
The default coordinate system is WGS84. If your POS file is not in this coordinate system, you can click the input box to enter the "Coordinate System Selection Panel", choose the correct coordinate system. The software supports geographic coordinate systems, projected coordinate systems, geocentric coordinate systems, and local coordinate systems. You can also select an elevation system, supporting geodetic height, 1985 National Vertical Datum, and custom geoid undulation.

Click the custom geoid undulation button, select a tif format geoid undulation file to import into the software, and save it as a custom elevation system.
Select Coordinate Accuracy
Click the coordinate accuracy dropdown box to select the POS accuracy. The software has three built-in coordinate accuracies: High-precision POS (RTK), Normal-precision POS, Low-precision POS. Generally, only select the High-precision POS (RTK) option if it is confirmed that the POS was obtained under good RTK signal conditions.
Confirm Import
Click the "OK" button to import the set position information. The software will automatically match it with the photos based on the set fields. If your photos include multiple POS files, you can repeat the first four steps to import them sequentially.