4.4 Preset Region of Interest
Under normal circumstances, the data collection range will exceed the target region of interest. Especially in scenarios involving surround photography of individual buildings like houses, the reconstructed image data will contain a background much larger than the individual building. Reconstruction in these scenarios wastes significant computing and storage resources. This software provides users with a preset region of interest function before any data processing, allowing reconstruction range limitation through external range file import or manual editing.
Open Region of Interest Edit Panel
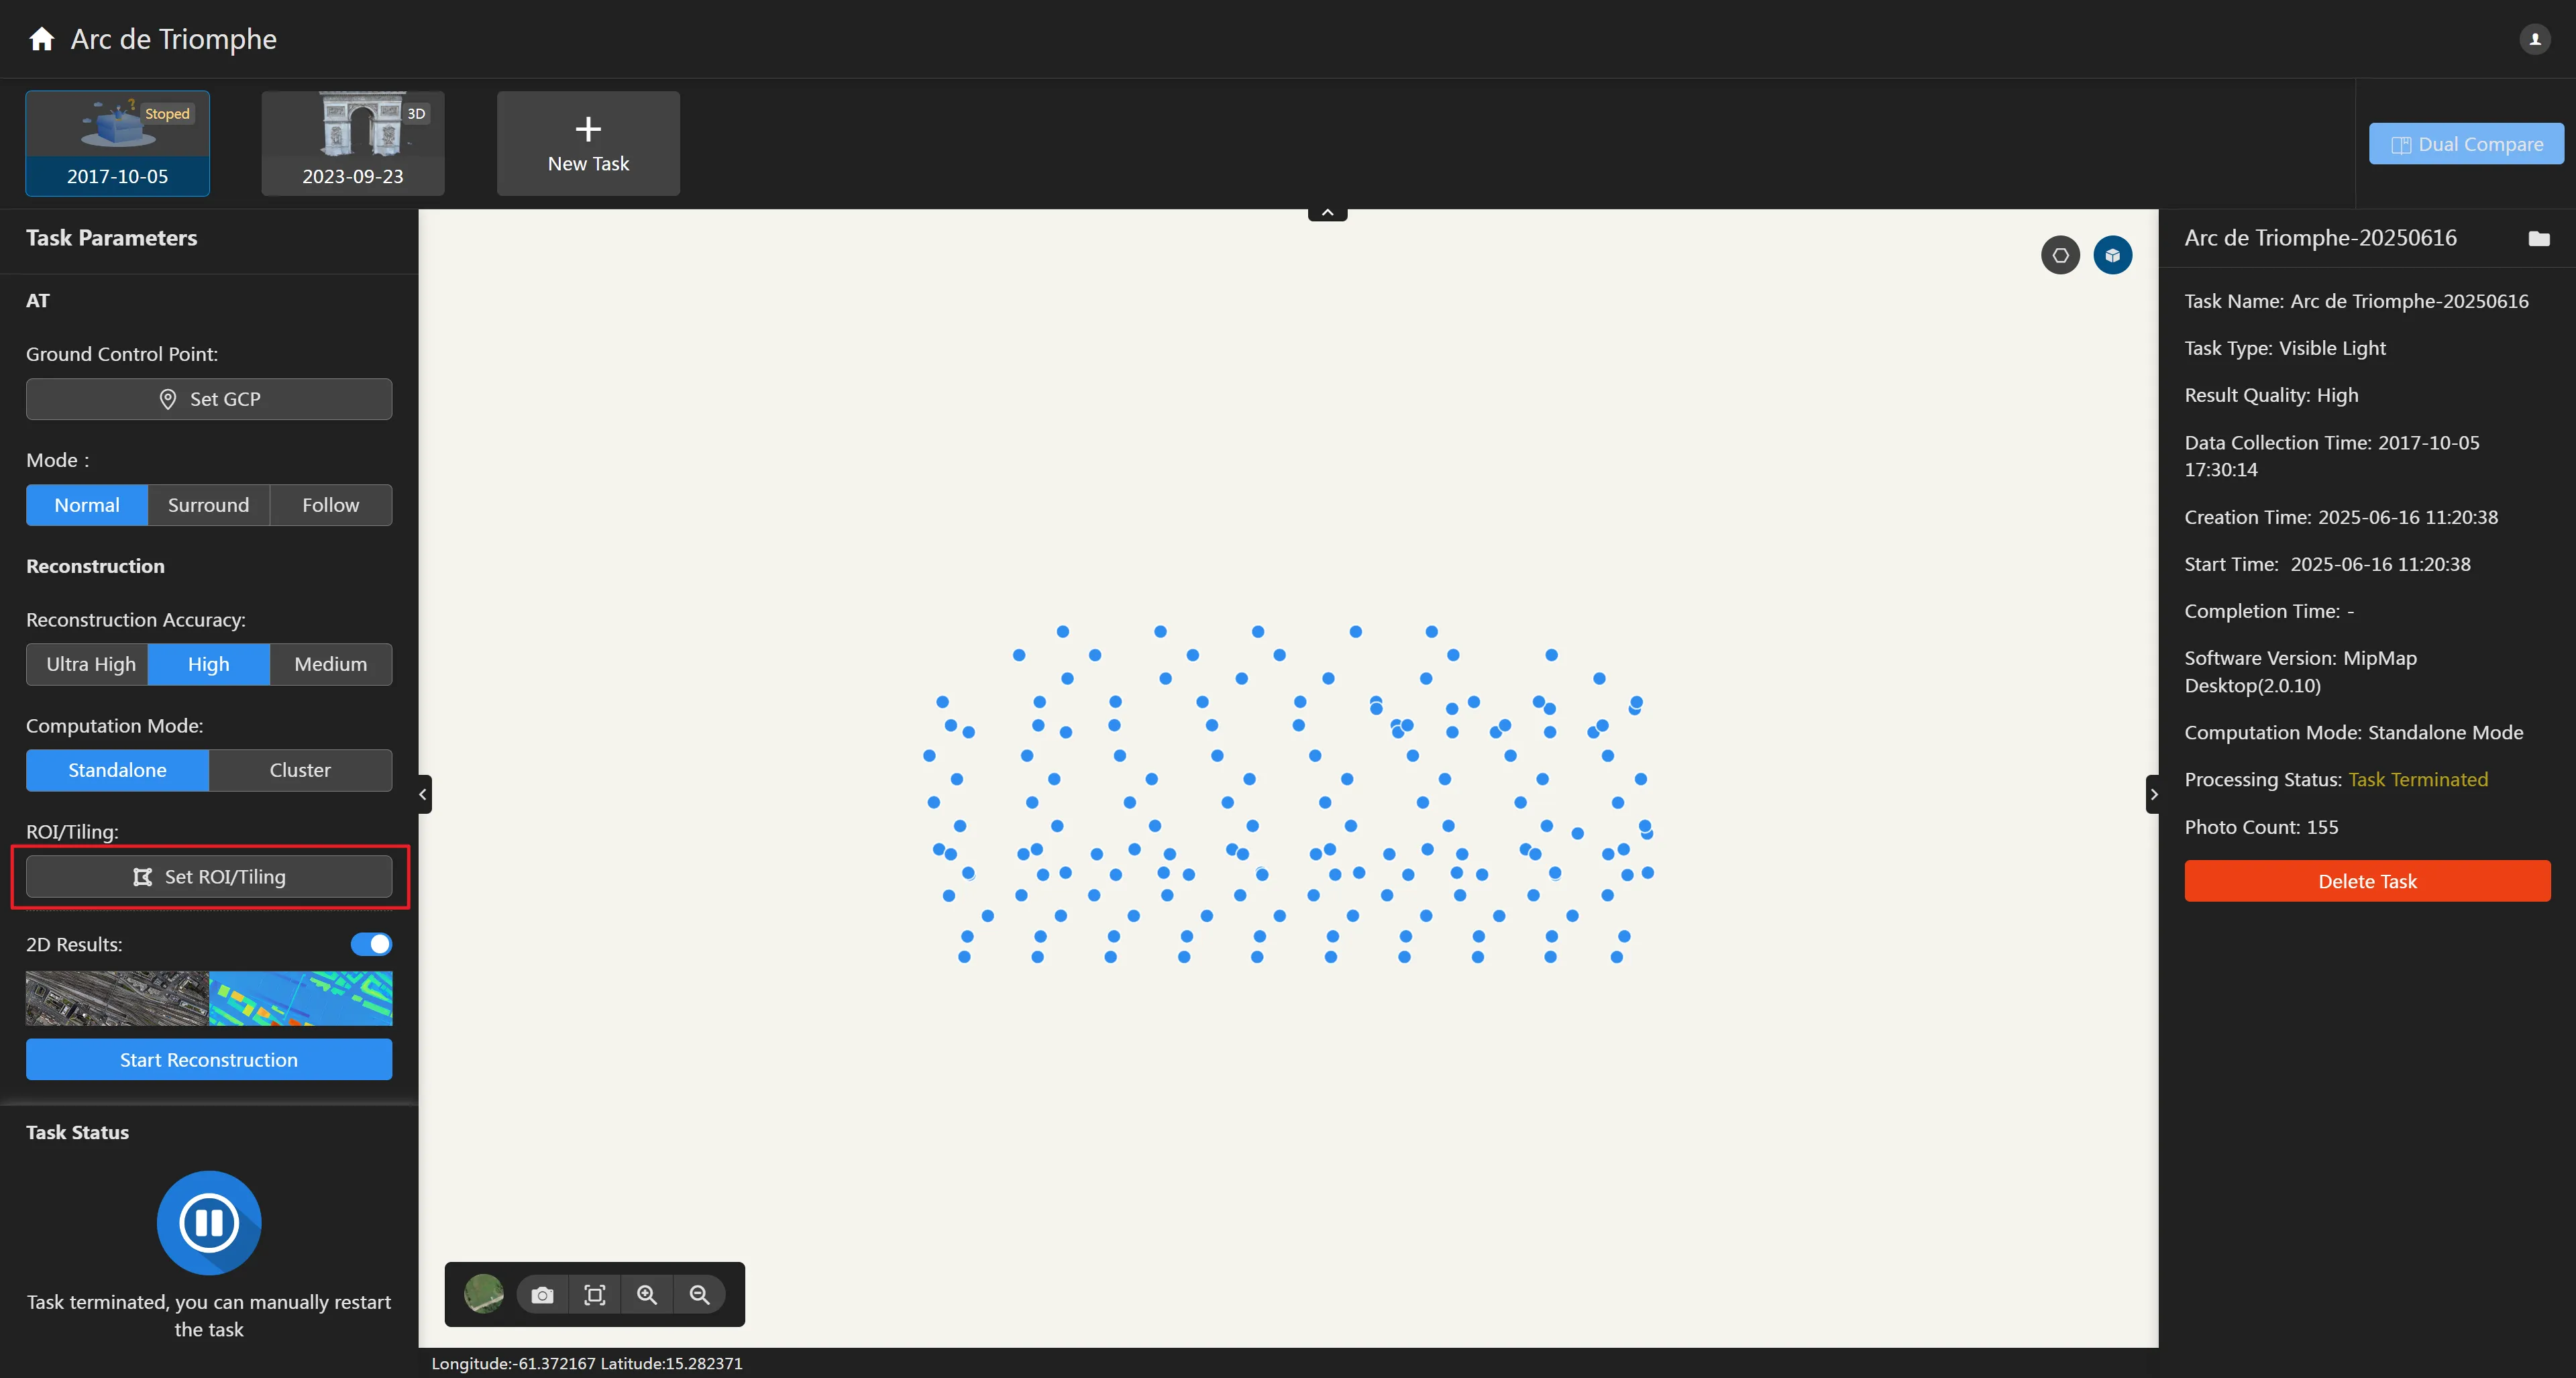
Click the Set Region of Interest button on the left side of the task creation page to enter the region of interest edit panel.

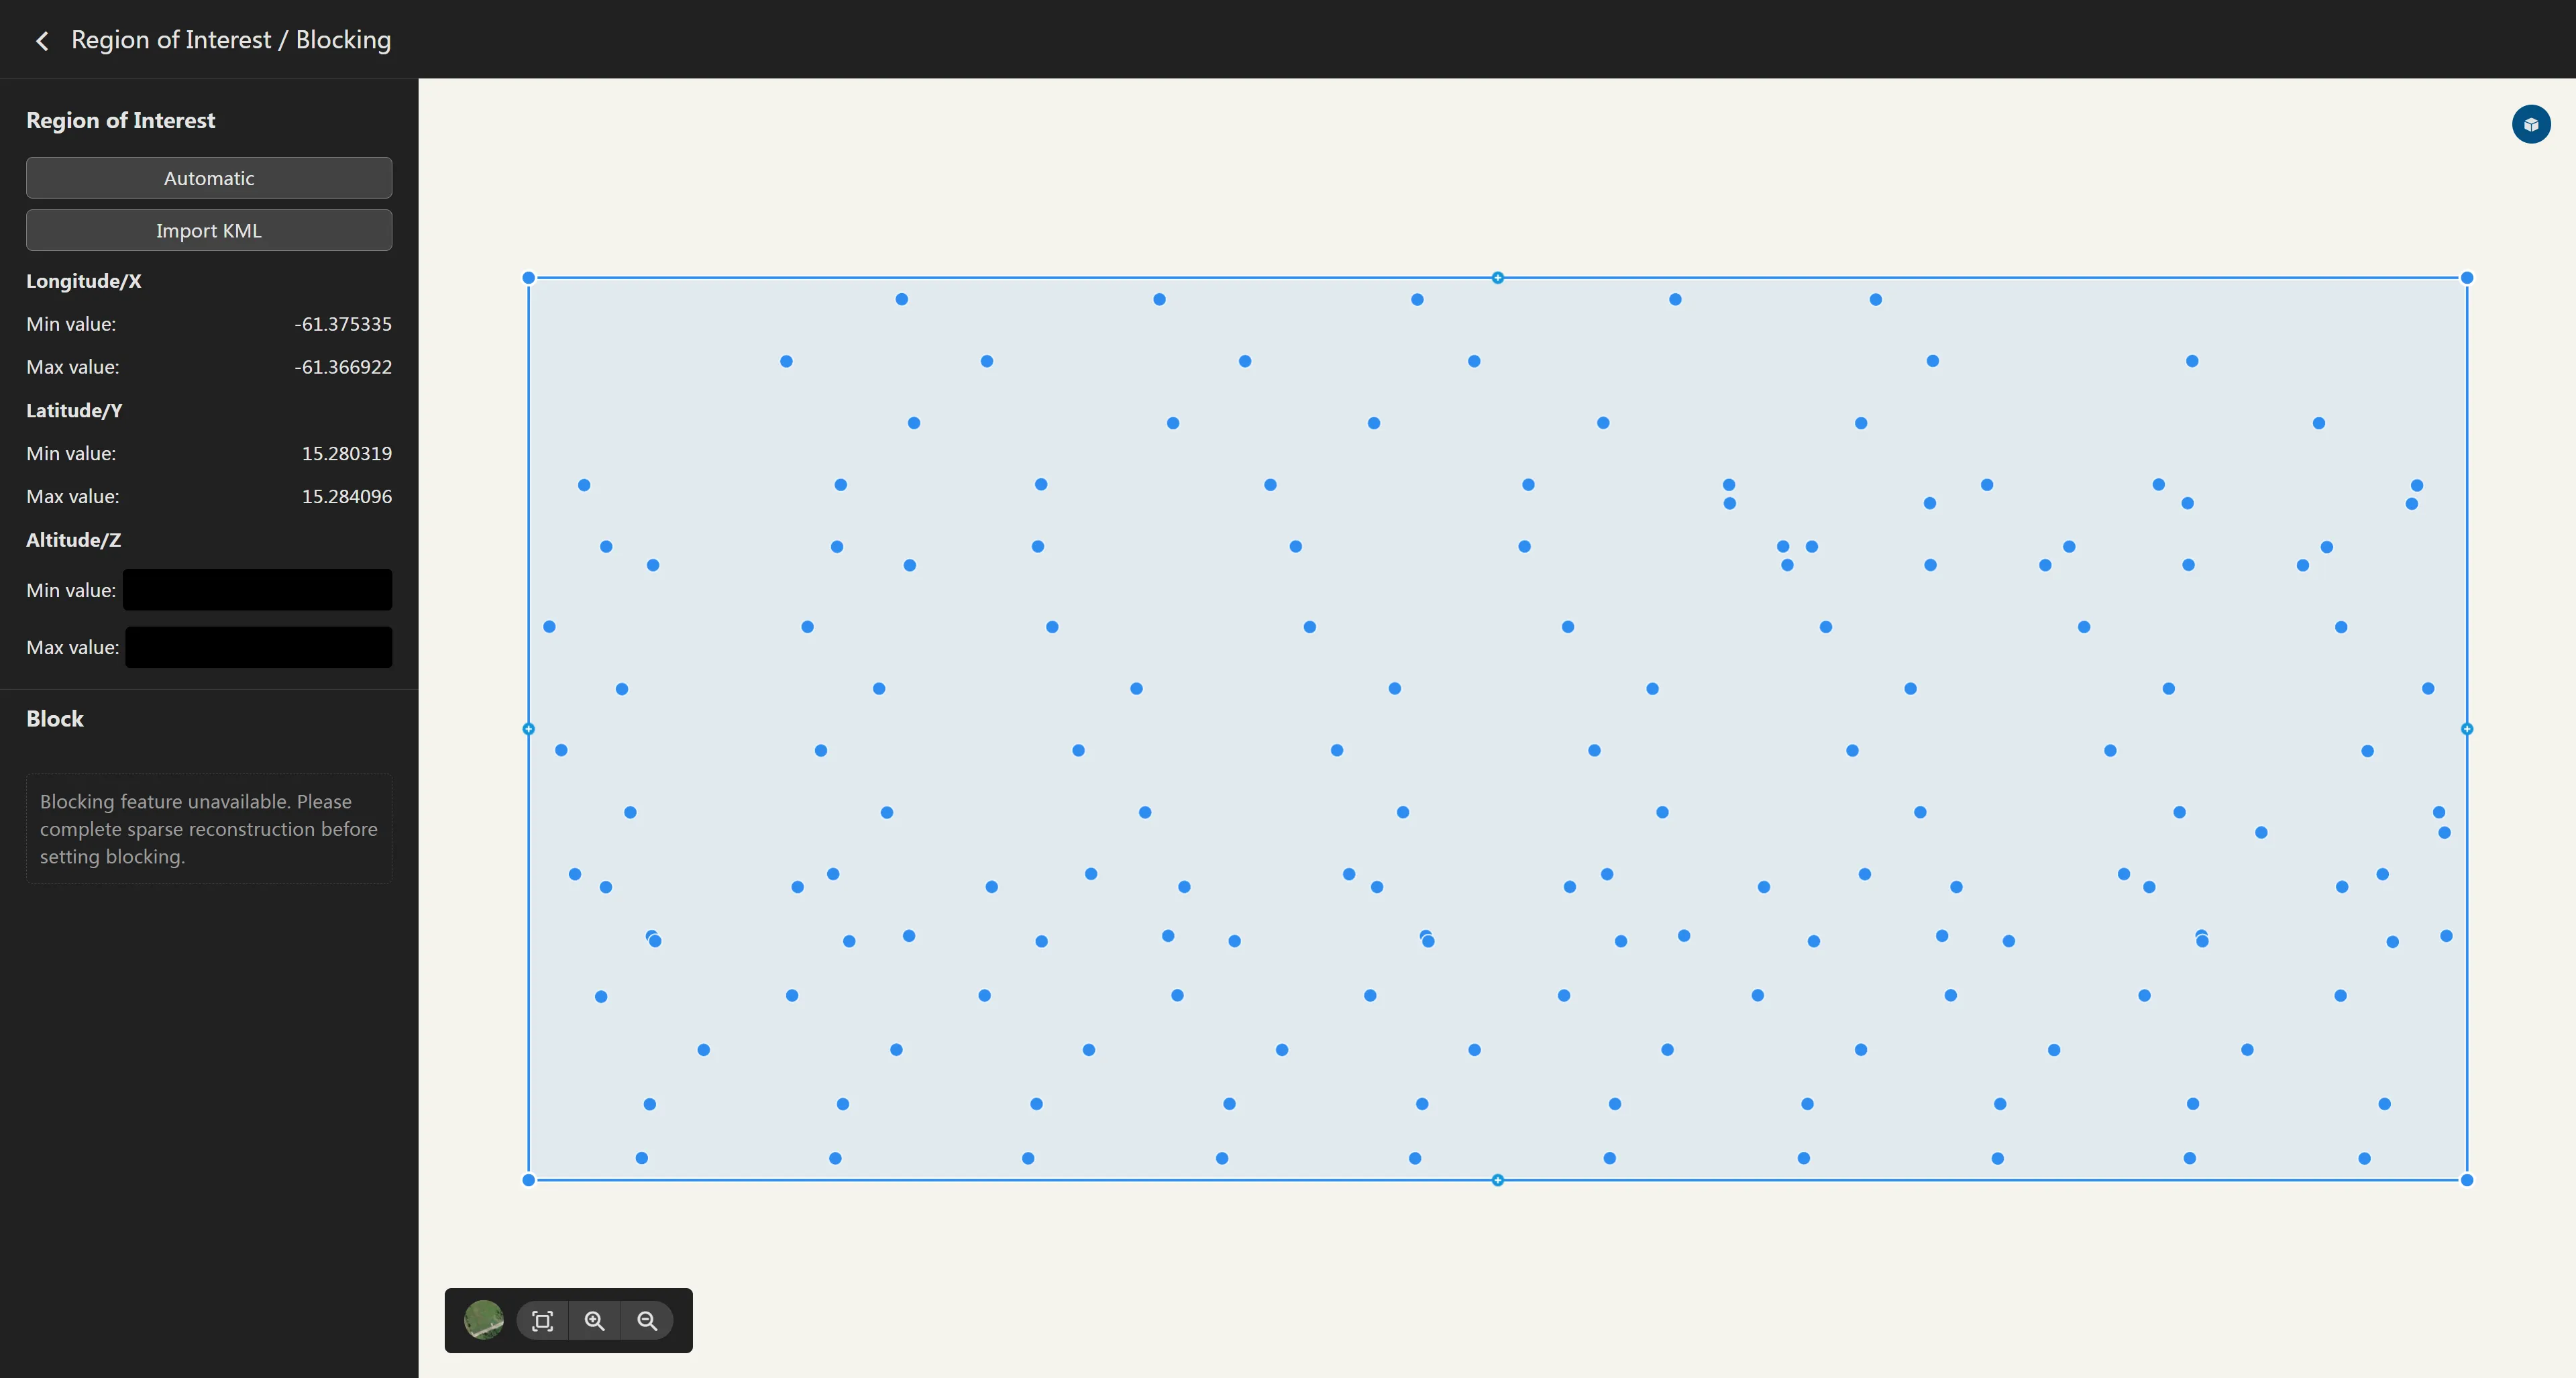
In the region of interest edit panel, you can import a KML file or click the "Auto" button to automatically generate a region of interest. You can also edit the region of interest on the map.

Import KML Region of Interest
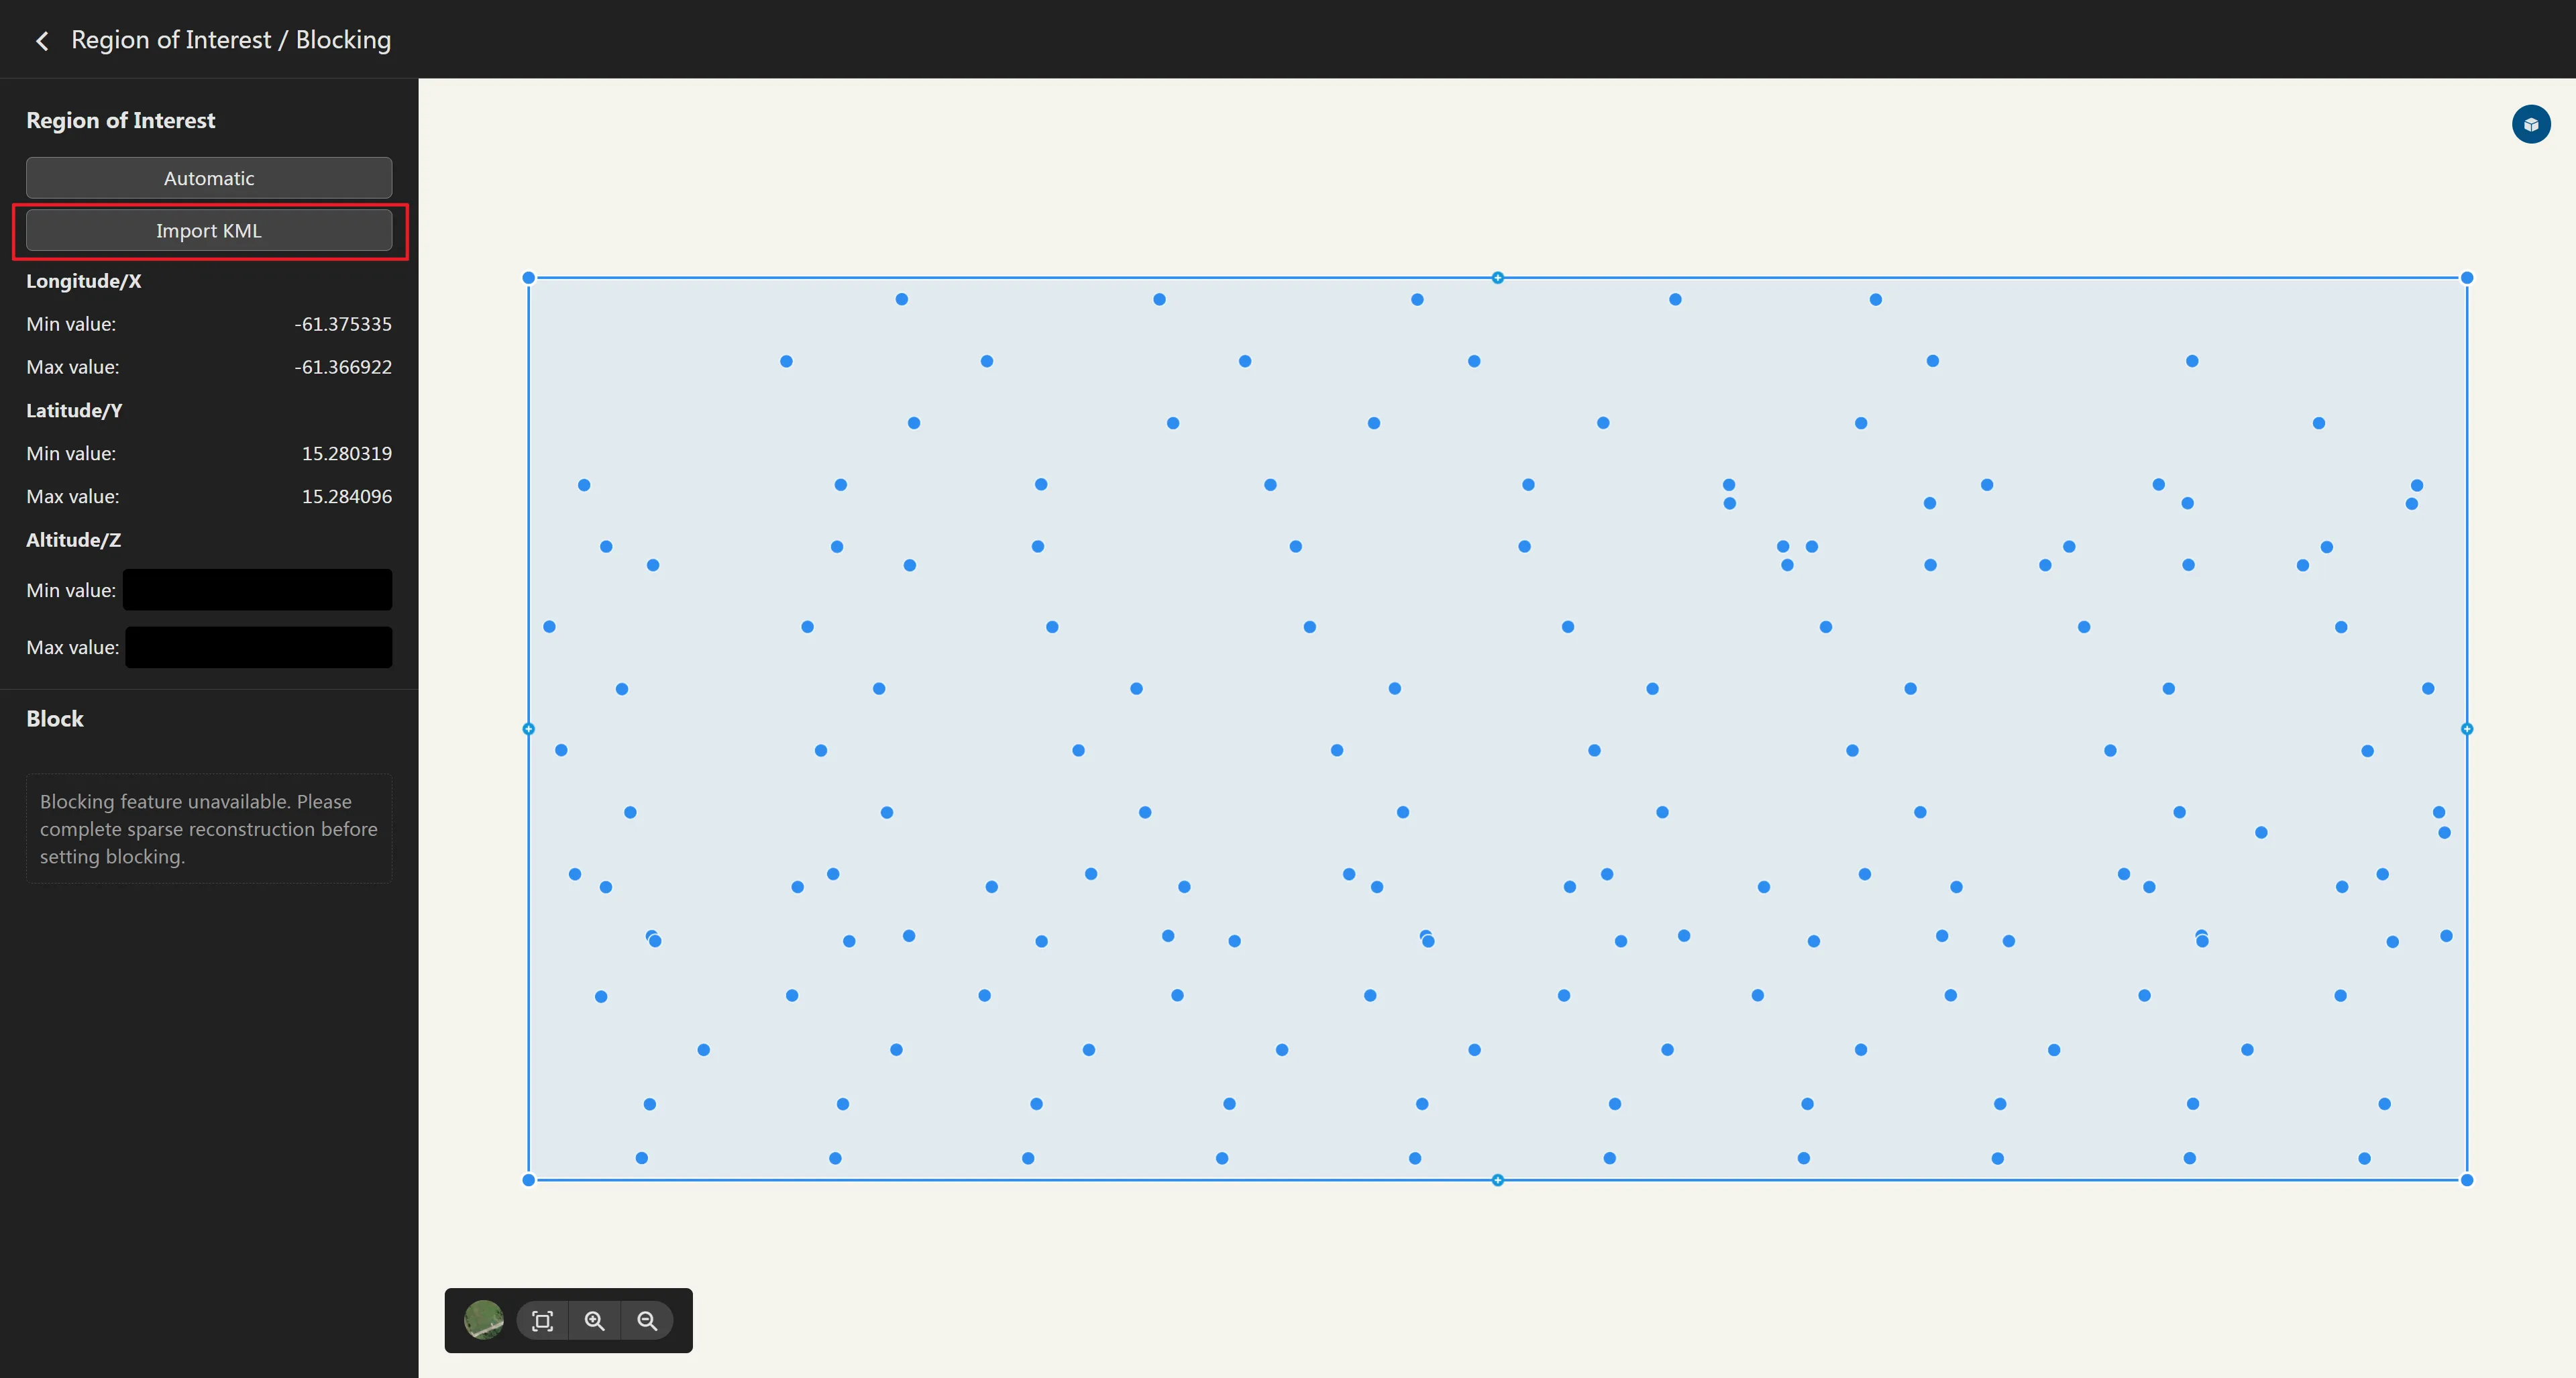
For UAV data collection platforms, users generally draw the data collection range in flight control software or Google Earth. This range can be exported in KML format and used as the region of interest range for this software. Click the Import KML button in the upper left corner of the region of interest edit panel, open the select file dialog box, choose the KML file to import, and the right side of the region of interest edit panel will display its range.

Manually Edit Region of Interest
To better manually edit the region of interest, it is recommended that users click to switch to the satellite basemap.
On the left side of the region of interest edit panel, you can enter the maximum and minimum height of the region of interest. By default, it is empty (no height constraint).

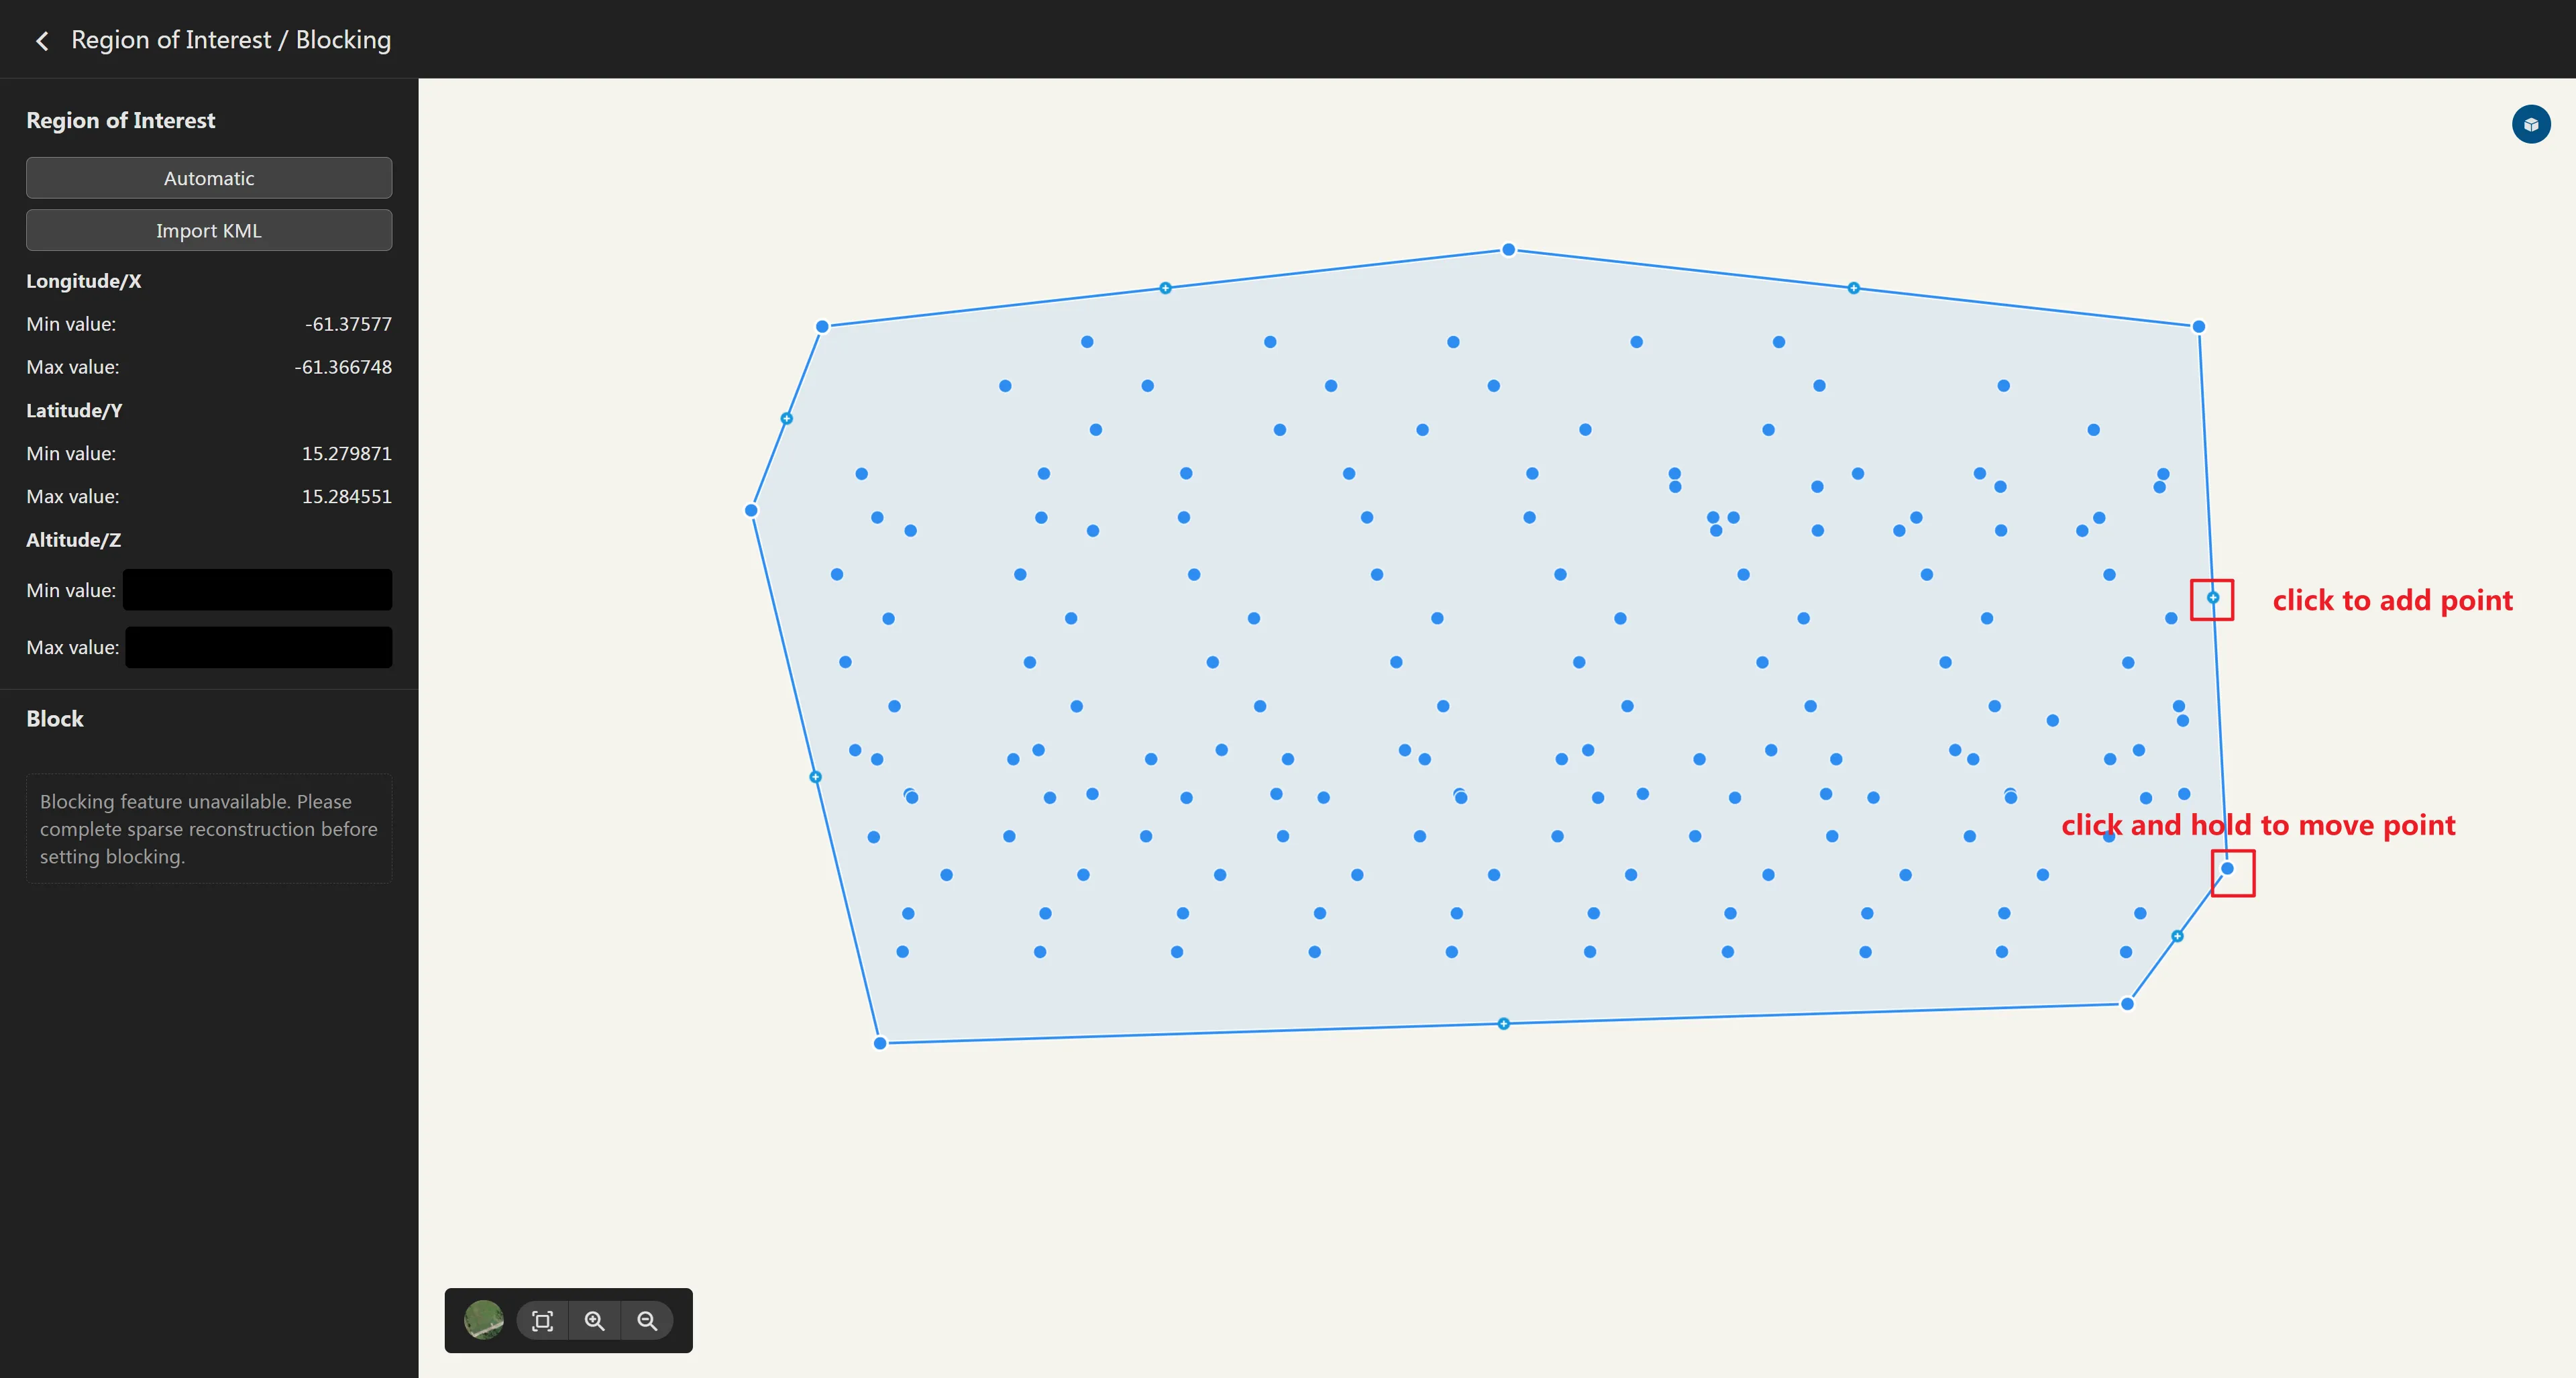
In addition, within the map on the right side of the region of interest edit panel, users are provided with polygon editing functions for the region of interest: add node, delete node, and drag node.
- Drag Node: As shown in the red box in the figure, the small solid circle is a draggable node. Click to select the node to be edited, press the mouse and move to modify the node's position, release the mouse to complete the modification, and the right panel will update the measurement information of this annotation.
- Add Node: As shown in the red box in the figure, the small hollow circle with a cross
is an addable node, located in the middle of the line segment between two draggable nodes. Click
to add a node between two nodes, and drag to adjust the node's position.
- Delete Node: Click the draggable node to be deleted, press the "Delete" key on the keyboard, or move the mouse to the node and right-click to delete the selected node. It should be noted that: the satellite basemap has a certain geometric error, generally 1-2 meters. Therefore, when editing nodes, try to reserve a certain space between the polygonal region of interest and the actual target region of interest.
Finish Editing
If the region of interest editing is complete, click the return button in the upper left corner. The software will automatically save and update the edited region of interest. After reconstruction, you will get the 2D and 3D results of the region of interest.